
Introduction
I think all of us know about the famous puzzle game "Rubik's Cube", many can solve it but not all, they all say that it is hard to memorize tons of algorithms. In this article I will teach the first algorithm that I learned (from my cousin), this algorithm is composed of 5 patterns only, but first you must know on how to solve the first layer all by yourself.
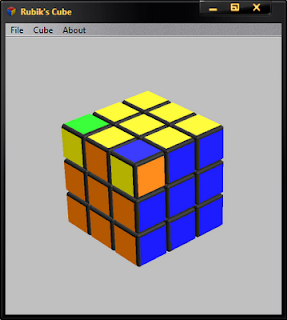
If you don't have a Rubik's cube right now you can use this software: http://bit.ly/MCApIJ
Just simply drag the side you want to rotate then right-click and hold to change view.
You can see the actual solving of the cube in the last part of this article.

Second Layer
To begin this tutorial first you need to solve the first layer, in this case we will use the white side as our base layer.
Note: The side of the first layer must be the same color, some starters do not solve it in that way.

Find a piece:
To begin solving the second layer you must first find a piece that belongs to the second layer. The piece we are talking about here is a piece that MUST be in the second layer but present in the 3rd layer.
In this case we need to move the blue-orange piece to its destination.
Right-Side
Step 1 (Align):

First align the "piece", the color must be the same with the color in the 2nd layer. In the picture above the blue part can be aligned with the blue center of the 2nd layer.
Note: If the piece is flipped, then you must align it in the orange side.
Step 2 (Move away):

Move the top part away from the "destination"
Step 3: Left (Upward)


Step 5: Left (Downward)

Step 6: Top (Leftward)

Step 7: Front (Clockwise)

Step 8: Top (Rightward)

Step 9: Front (Counter-Clockwise)

Left Side
Step 1: Find the piece

Step 2: Move it away

Step 3: Front (Clockwise)

Step 4: Top (Rightward)

Step 5: Front (Counter-Clockwise)

Step 6: Top (Rightward)

Step 7: Left (Upward)

Step 8: Top (Leftward)

Step 9: Left (Downward)

Explanation of the Picture (above):
We first aligned the piece where it must be, in this case the blue side is the one that we need to align.
The next step is to move the top part away from it's destination.
We now apply our algorithm (face the blue side) which is:
Right:
Left (Upward)
Top (Leftward)
Left (Downward)
Top (Leftward)
Front (Clockwise)
Top (Rightward)
Front (Counter-Clockwise)
Left (after moving away):
Right (Upward)
Top (Rightward)
Right (Downward)
Top (Rightward)
Front (Counter-Clockwise)
Top (Leftward)
Front (Clockwise)
If you did it right the piece should be in it's proper position.
Note: Just decide what must be used between those patterns, they are just the same pattern, they're just mirrored.
3rd / Last Layer
The last layer is made up of 3 parts, first is we create a "cross" that match all the colors of its side. Second is we arrange the corners so that they end up in their proper position, then lastly we rotate them in the correct way they must be.
Building the "Cross"
To start building the last layer we must create a cross first (In this algorithm only).
Possible Cases:
When you finished the 2nd layer there are 4 possible outcome.
1: The cross is already there
2: There is a small inverted "L" in the patterns
3: There is a horizontal pattern
4: No pattern at all
Pattern:
Video
Text
Front (Clockwise)
Right (Upward)
Top (Leftward)
Right (Downward)
Top (Rightward)
Top (Rightward)
Front (Counter-Clockwise)
Situation:
The cross

That is how the "cross" should look like, just disregard the other yellow pieces, you must have that pattern in order to move to the next part.
Small inverted "L":

The part highlighted in cyan is the inverted "L", it must consist of 3 piece wherein 1 of them is the center. It must also face in that way.
The red part will be your "Front" part where you will start to apply the given algorithm (above).
Note: If you did it right then you'll now have a cross.
Horizontal Line

The picture above is the "Horizontal Line", as you can see our top pieces form a horizontal line (disregard other piece/s). The red part is where you will face and start the algorithm that I posted above.
Note: If you did it right then you'll now have an "Inverted L.


The Algorithm:
Right (Upward)
Top (Leftward)
Right (Downward)
Top (Leftward)
Right (Upward)
Top (Leftward)
Top (Leftward)
Right (Downward)
Top (Leftward)
If they are opposite to each other then you can perform the algorithm above anywhere. But if you have an adjacent side the two arranged piece must be in your back and in your right (see the video).
Note: if you did the right thing then all of those 4 sides must be in their proper order now.

Look at those two encircled corners, the first corner is already in its proper position, why? It is composed of Blue-Yellow-Orange and the color around it is the same (but not in the same order). The 2nd picture has a corner which is not in its correct position, Blue-Red-Yellow corner while the colors around it is Yellow-Red-Green.
Note: The "in-position" corner must be in your front-right side, if there is no corner in position then you can start anywhere.
Top (Leftward)
Right (Upward)
Top (Rightward)
Left (Upward)
Top (Leftward)
Right (Downward)
Top (Rightward)
Left (Downward)
Note: Do it repeatedly until all four corners are in their proper position.
After you solved one (1) corner you proceed to slide up the next corner (rightward) and do the same algorithm.
Note: If you did it right then you'll now have an "Inverted L.
No pattern at all

This is a formation that do not have any pattern (no cross, inverted L or the horizontal line). In this kind of formation you just apply the algorithm I gave above, and you're free to choose where to start.
Cross Done!
At this time your final layer must have the cross now, the next step is to arrange the cross so that the pieces are placed in their proper order.
Arranging the "Cross"
The next step to solve a rubik's cube is to arrange the cross like the picture below, as you can see all four piece of the "Cross" is aligned in their own color, but sometimes you'll only get 2 aligned parts.

The Algorithm:
Right (Upward)
Top (Leftward)
Right (Downward)
Top (Leftward)
Right (Upward)
Top (Leftward)
Top (Leftward)
Right (Downward)
Top (Leftward)
Where to start?
First rotate the top layer and see if you can have two (2) sides in their proper position. There are two possible position here, adjacent or opposite to each other.If they are opposite to each other then you can perform the algorithm above anywhere. But if you have an adjacent side the two arranged piece must be in your back and in your right (see the video).
Note: if you did the right thing then all of those 4 sides must be in their proper order now.
Arranging all four corners
This is the 2nd to the last pattern, now that you have a perfect cross that are placed where they must be we will now arrange the corners so that they are placed in their proper order (it doesn't matter if they are solved or not).
Look at those two encircled corners, the first corner is already in its proper position, why? It is composed of Blue-Yellow-Orange and the color around it is the same (but not in the same order). The 2nd picture has a corner which is not in its correct position, Blue-Red-Yellow corner while the colors around it is Yellow-Red-Green.
The pattern
Now that you saw what we are looking for we will now proceed to the algorithm.Note: The "in-position" corner must be in your front-right side, if there is no corner in position then you can start anywhere.
Top (Leftward)
Right (Upward)
Top (Rightward)
Left (Upward)
Top (Leftward)
Right (Downward)
Top (Rightward)
Left (Downward)
Note: Do it repeatedly until all four corners are in their proper position.
Final Step

At this time you must now have this, a cross in their proper order and all corners in their proper location. The final step will arrange those corners properly.
Note: Sometimes you'll have 4 corners , 3 corners or 2 corners to arrange.
Algorithm:
Right (Downward)
Bottom (Leftward)
Right (Upward)
Bottom (Rightward)
How to use it: First you start in the right most unsolved corner (if all corners are unsolved then choose anywhere), from that corner implement these four moves and do it repeatedly until the piece is solved.
Note: When you implement the 3rd pattern (Right [Upward]) you'll see that the piece is already in its place, but you must implement the 4th move because it will not be solved if you skip it.
After you solved one (1) corner you proceed to slide up the next corner (rightward) and do the same algorithm.
Full video of solving the rubik's cube using the those patterns (sorry for the low quality it's hard to upload videos):
This is my first tutorial so please pardon my words if they are hard to understand, feel free to comment any question, suggestion for next article or other concerns.
For serious cubers: If you want to learn the pattern that professionals used then visit this site: http://cubewhiz.com/, but you need to memorize tons of algorithms (around 200+).
Source: My memory
Special Thanks to my cousin Brandel Don Magdangan for teaching me this pattern (first pattern that i've learned 4 years ago.)


Post a Comment